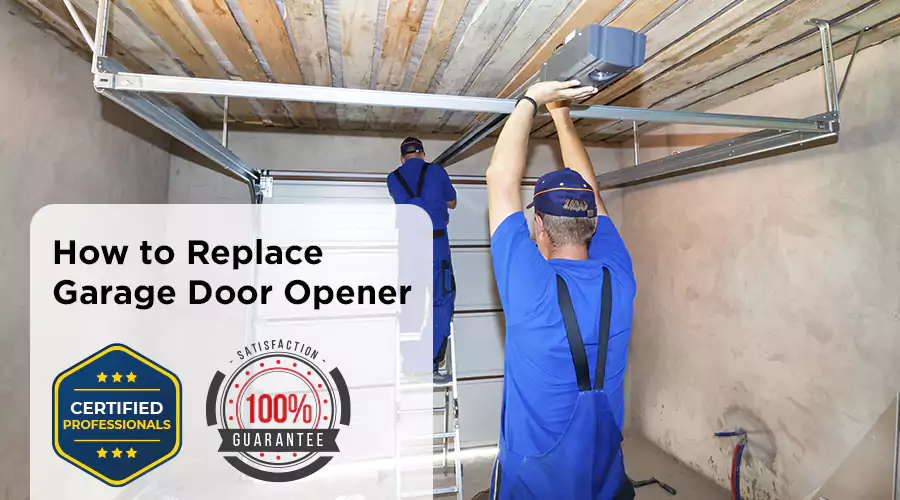
Your garage door opener begins to give you trouble, not responding properly, making a disturbance, or just being too old to be effective; then you should consider to replacing a garage door opener. Installation of a new garage door opener may look like a challenging but with the proper guidance and supplies, and safety caution it may be an easy task a self-assured DIYer. The knowledge of replacing a garage door opener is a learning experience as a homeowner that increase your home's convenience and security as well as help you save money. This guide will teach you all you need to know to install a garage door opener, including how to select the best garage door opener in 2025, how to wire your opener, or just how to safely replace something that has broken down.
Why Replace Your Garage Door Opener?
Homeowners change their garage door opener for a number of reasons:
- It’s too noisy or vibrates heavily
- The system lacks contemporary safety measures or is out of date.
- It’s incompatible with smart home devices
- It doesn’t operate reliably
- It poses security concerns
New models offer improved safety, convenience, and quiet operation. A DIY install can also save you hundreds in labor costs.
Tools & Materials You’ll Need
Tools:
- Adjustable wrench
- Screwdrivers (flat and Phillips head)
- Power drill
- Socket set
- Level
- Step ladder
- Pliers
Materials:
- New garage door opener
- Mounting brackets (usually included)
- Safety sensors
- Fasteners and hardware (check package contents)
- Light bulbs (for the opener if needed)
Step-by-Step Garage Door Opener Replacement
1. Safety First
Before doing any garage door opener replacement, prioritize safety:
- Disconnect power: Unplug the opener or switch off the circuit breaker.
- Secure the door: Clamp or lock the door on the tracks under the rollers.
- Release the carriage: To detach the trolley, pull the red manual release cord.
- Wear protective gear: Use gloves and safety glasses.
Personal Warning: On my first DIY Garage Door Opener Replacement, I skipped clamping the door—it jolted down suddenly when I released the tension. The garage door should always be seen as a possible safety risk.
2. Remove the Old Opener
A. Disconnect Power and Controls
- Unplug the unit.
- Remove the wall control switch using a screwdriver. Set wires aside.
- Detach the safety sensors from each side of the door.
B. Detach the Opener from the Door
- Disengage the trolley using the release cord.
- Loosen the bolts or nuts holding the door bracket and opener arm together.
- Using a ladder or assistant, support the opener motor while removing the rail from the ceiling mount.
C. Lower the Old Unit
Carefully bring down the motor head, rail, and drive components. Watch for sharp edges and disconnect any attached wires.
Pro Tip: Label wires before disconnecting to make reinstallation easier.
3. Install the New Garage Door Opener
A. Assemble the Rail and Drive
- Lay out the rail sections.
- Connect per manual (chain, belt, or screw drive).
- Attach the rail securely to the motor head—tighten all bolts.
B. Mount the Ceiling Bracket
- Locate a ceiling joist using a stud finder.
- Secure the support bracket with lag bolts.
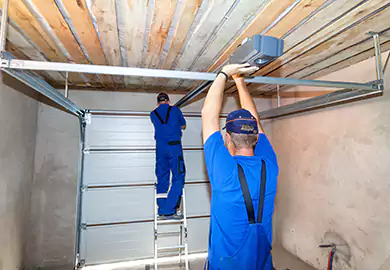
C. Lift and Secure the Motor Unit
- With help, lift the opener and rail into position.
- Bolt the rail to the ceiling bracket, leaving bolts slightly loose to allow alignment.
D. Attach the Door Arm
- Reattach the curved arm to the trolley.
- Bolt the straight arm to the door bracket—ensure it's centered.
E. Align and Tighten Rails
Make sure the rail is parallel to the door track. Adjust and then tighten all bolts.
Safety Tip: Never hang the motor with drywall anchors. Attach only to ceiling joists or sturdy framework.
4. Wiring and Power Up
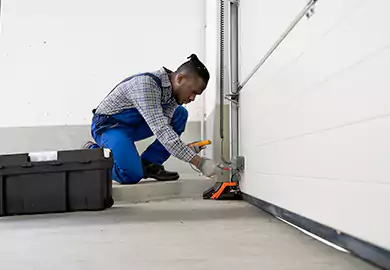
A. Install Safety Reversing Sensors
- Mount sensors 4–6 inches from the floor on each side.
- Align beams until LEDs stay solid.
- Run low-voltage wire to the opener head with a service loop.
B. Wall Switch Wiring
- Mount the wall switch at least 5 feet high.
- Connect the wires to the opener, checking polarity per manual.
C. Plug in Power
- Plug into a grounded outlet.
- Open/close the door manually once to check for smooth motion.
5. Programming & Testing
A. Remote Control Setup
- Press the motor’s "Learn" or "Smart" button.
- Within 30 seconds, press the remote until lights flash or you hear a beep.
B. Wall Control Settings
- Set open/close limits via screws or digital panel.
- Safety Reverse Test: Place a 2×4 board under the door. Close the door. It should reverse upon contact.
- Sensor Obstruction Test: Wave a broom through the beam. Door should stop or reverse.
C. Fine-Tuning
- Adjust force settings: too high can damage the door; too low may prevent lifting.
- Test 10+ open/close cycles. The door should move smoothly and quietly.
Installer Tip: Expect to tweak limit/force settings after a few cycles as the system settles.
Troubleshooting Common Garage Opener Issues
| Symptom | Likely Cause | Fix |
|---|---|---|
| Opener hums but doesn’t lift | Door jammed or spring tension wrong | Re-lubricate, inspect springs |
| Safety reverse fails | Misaligned or dirty sensors | Clean lenses, realign, check wiring |
| Remote not working | Needs reprogramming or new battery | Re-sync or replace battery |
| Loud travel noise | Loose chain/belt or misaligned rail | Tighten drive, realign rail |
Smart Garage Door Opener Options in 2025
The best 2025 models include Wi-Fi, app controls, voice integration, and secure in-garage delivery. Popular picks:
| Model | Features |
|---|---|
| Chamberlain B970 | Quiet belt drive, Wi-Fi, backup battery |
| LiftMaster 87504 | Built-in camera, motion alerts, smartphone control |
| Genie StealthDrive Connect | Alexa/Google integration, quiet belt |
The best 2025 models include Wi-Fi, app controls, voice integration, and secure in-garage delivery. Popular picks:
Qualities to Consider in a Garage Door Opener
- Motor power: ½ HP (single doors), ¾–1 HP (double/heavy doors)
- Quiet belt drive for attached garages
- Built-in Wi-Fi, app access, auto-locking
- Battery backup
- Safety features: auto-reverse, rolling code encryption
- Choose reputable brands for long-term reliability
Choosing the Right Opener Type
| Type | Best For | Pros |
|---|---|---|
| Chain Drive | Heavy garage doors | Strong, affordable, but noisy |
| Belt Drive | Quiet operation | Smooth and silent; great for attached garages |
| Screw Drive | Mild climates | Fewer parts, lower maintenance |
| Wall-Mounted | High ceilings or tight spaces | Saves space, clean install |
| Smart Openers | Tech-savvy homes | Remote access, voice control, app features |
Garage Door Opener Cost Breakdown
| Expense | Low End | High End |
|---|---|---|
| Standard opener | $150 | $300 |
| Premium smart/belt drive | $350 | $600+ |
| Sensors, remotes, keypads | $50 | $100 |
| Tools, brackets, extras | $30 | $60 |
| Additional wiring/parts | $10–$50 | $100–200 |
| DIY installation | — | Saves labor cost |
| Professional install | $100–200 | $200–400 |
DIY Total: $160–$700
Pro Install: $300–$1,000 depending on model/complexity
Final Checklist before Wrapping Up
- All wires secured and labeled
- Safety sensors working and aligned
- Remote/keypad/HomeLink synced
- Open/close limits and force settings tested
- Smart features set up
- Full load cycle tested
- Chain/belt lubricated and sensor lenses cleaned
Conclusion
Replacing your garage door opener is a rewarding DIY project with long-term benefits: improved safety, quieter function, and smart convenience. By following this comprehensive guide—from prep and safety to install, wiring, and testing—you’ll complete a professional-grade upgrade. Choose a model that suits your garage and tech preferences, and don’t hesitate to ask questions. I've completed hundreds of these and am happy to help!